Graco Sprayer Troubleshooting Mega-Thread: Every Priming, Pressure and Pulsing Problem Diagnosed
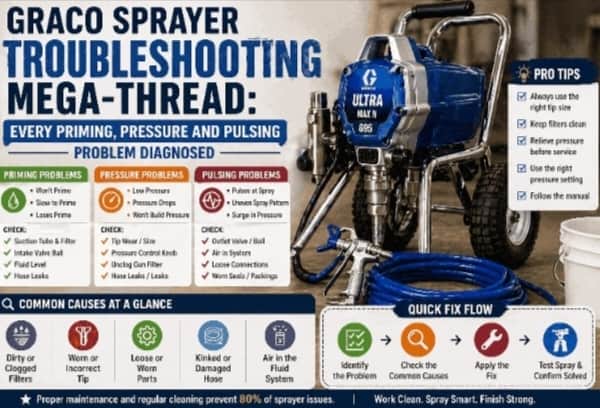
This is the reference guide we wish existed every time a contractor called us on a Friday afternoon with a machine that wasn't working and a job starting Monday. What follows is a systematic diagnosis for every common Graco airless sprayer failure — organised by symptom, not by component — so you can work through a real problem in the order it actually presents itself.
Use the section headers to jump directly to the symptom you're experiencing.
Before any diagnosis: relieve pressure first. Turn the machine off, set the prime/spray valve to PRIME, and trigger the gun into a waste bucket until flow stops completely. Never work on a pressurised machine.
Section 1: Machine Won't Start at All
Symptom: You turn on the switch and nothing happens. No motor sound, no pump movement, nothing.
This is the easiest category to work through because it's almost always electrical, not mechanical.
Check 1: The obvious stuff first. Is the machine plugged in? Is the outlet live? Test the outlet with something you know works. Swap to a different circuit. These sound trivial, but they account for more "machine won't start" service calls than anyone wants to admit.
Check 2: Extension cord issues. Graco specifies a maximum 100-foot extension cord at 12-gauge or heavier. A 14-gauge extension, or one longer than 100 feet, causes voltage drop that prevents the motor from starting or causes it to shut down under load. If you're using an extension cord, plug the machine directly into a wall outlet and try again.
Check 3: The circuit breaker on the machine. Most Graco contractor machines have a built-in circuit breaker — typically a small button on the machine body, often near the ON/OFF switch. If the machine overloaded or got hot, this button trips and must be manually reset. Look for a small red or black button that may be slightly proud of its housing. Press it firmly until it clicks. Try starting again.
Check 4: Pressure setting. If the pressure control knob is at minimum and the machine is in SPRAY mode, some models will not start because the pressure transducer reads the trigger-released condition as "no pressure needed." Turn the pressure control knob clockwise to a mid-range setting and try again.
Check 5: Machine was stored pressurised. If the machine was shut off while still pressurised (prime/spray valve in SPRAY position, trigger not pulled before shutoff), the machine may not restart because the motor can't overcome the static system pressure. Engage trigger lock, set prime/spray valve to PRIME, carefully trigger the gun into a waste bucket to relieve pressure, then try starting normally.
If none of these work: The problem is internal — a failed capacitor, circuit board, or motor. These require a service centre. Note that SmartControl circuit boards on 395, 490, and 595 series machines are serviceable components that cost $150–$300, and board failures are more common on machines that have accumulated overspray in the control housing. Do not attempt to open the electrical housing unless you are trained and the machine is unplugged.
Section 2: Machine Runs But Won't Prime
This is the most common category of problem. The motor sounds, the pump moves, but no paint comes up the suction tube.
Work through these in order — start with the cheapest and simplest checks before concluding you need a packing kit.
2a: Suction tube not submerged / paint level too low
The suction tube must be fully submerged in paint, not just touching the surface. On machines drawing from a 5-gallon bucket, when the paint level drops below the last two to three inches, the suction tube may be pulling a mix of air and paint rather than pure paint. This causes intermittent priming that sounds like the machine is about to prime but then loses it.
Fix: Maintain adequate paint level in the bucket, or tilt the bucket slightly so remaining paint concentrates on the suction tube side. For 1-gallon containers on smaller machines, make sure the suction tube is positioned at the low point of the container.
2b: Inlet strainer clogged
The mesh strainer at the bottom of the suction tube is the first filter paint passes through. If it's clogged with debris, dried paint, or paint skin from the top of an inadequately covered bucket, the pump can't draw enough fluid volume to prime. This is particularly common when paint has been sitting without the lid on and a skin has formed on top that then gets sucked into the strainer.
Fix: Remove the inlet strainer, rinse under running water, inspect against the light. Mesh should be fully clear with no compressed debris. If the mesh is damaged or torn, replace it — a torn strainer sends debris directly into the pump's check valve assembly, which causes problems downstream.
2c: Stuck inlet valve ball (the most common overnight failure)
The inlet valve check ball sits inside the pump foot valve (the housing at the bottom of the pump where paint enters). When a machine is stored without Pump Armor and the ball sits against its carbide seat for days or weeks, the tiny amount of dried residue around the contact area can bond the ball to the seat enough that it won't lift on the pump's intake stroke. The machine sounds normal, the piston is moving, but no fluid is being drawn because the ball won't open.
Diagnosis: Machine primes fine with water but won't prime with paint, or machine primed yesterday but won't today.
Fix — the pencil trick: With the machine off and unplugged, insert the tip of a pencil (or a small non-metallic rod) into the pump inlet opening — the opening where the suction tube connects — and push gently upward. You should feel the ball move. Turn the machine on, set to PRIME, and try priming immediately. This often frees a lightly stuck ball. If the ball sticks again within a few cycles or won't free at all, the inlet valve kit (239922 for most Graco contractor models) needs replacement.
Fix — tapping method: With the machine running on PRIME, tap the metal inlet valve housing firmly with a wrench handle or rubber mallet. The vibration can free a lightly stuck ball. This is a temporary measure — if you need to do this repeatedly, the valve needs replacement.
2d: Air leak on the suction side
If the pump is pulling air rather than paint, you'll hear it cycling faster than normal with a distinctive sucking-air sound, and you'll see bubbles in the prime tube return line. Air leaks on the suction side happen at:
The connection between the suction tube and the pump inlet (cracked O-ring or loose fitting)
A crack in the suction tube itself
The inlet strainer not seating properly after cleaning
Fix: Check all connections on the suction side. Tighten fittings. Inspect the suction tube for cracks by running your hands along its full length under good lighting. If you see small cracks or the tube feels soft in spots, replace it. Suction tube cracks are particularly common on older machines that have been stored in temperature extremes.
2e: Prime valve leaking internally
The prime/drain valve (235014 kit on most Graco contractor models) is a valve that directs fluid either back to the bucket (PRIME position) or up the hose to the gun (SPRAY position). If the valve seat is worn or debris is preventing it from seating correctly, it can leak internally in SPRAY mode — meaning fluid that should be going up the hose is bleeding back to the bucket. The machine primes in PRIME position but won't hold prime when switched to SPRAY.
Diagnosis: Machine primes and moves paint through the drain/return tube on PRIME. Switch to SPRAY position — if the machine immediately cycles rapidly and pressure drops away, the prime valve is leaking.
Fix: Clean the prime valve seat of any debris. If cleaning doesn't resolve it, the 235014 prime valve kit replaces the seat and sealing components.
2f: Worn packings (internal bypass)
If the pump packings are worn, the piston's discharge stroke doesn't create adequate pressure to seat the outlet check ball properly, and fluid that should be going up the hose bleeds back down through the worn packing area. The machine sounds like it's working — cycling normally, no obvious fault — but never pulls paint.
Diagnosis: Machine primes fine with water (water is thin enough that even worn packings can pull it up), but won't prime with paint (paint is thick enough that the reduced suction from worn packings isn't sufficient).
Fix: 18B260 packing kit. This is the correct repair after all other suction-side causes have been ruled out.
Section 3: Machine Primes but Won't Build or Hold Pressure
The machine primes successfully — paint comes up the suction tube, flows through the return tube on PRIME — but when switched to SPRAY, it either can't build adequate pressure or pressure builds and immediately bleeds away.
3a: Gun filter clogged
This is the most commonly missed diagnosis in this symptom category. The gun filter restricts material flow at the gun, which reads as inadequate pressure at the tip even though the machine is building correct pressure at the manifold. You'll see the machine cycling at speed while delivering what looks like low-pressure spray.
Diagnosis: Remove the gun filter. With a bucket in place, trigger the gun with no filter installed — if flow improves dramatically and pressure feels normal, the gun filter was the problem.
Fix: Replace the gun filter. Always replace, not just rinse — a filter that clogged once has compressed debris in the mesh that doesn't fully clear with rinsing.
3b: Manifold filter clogged
The manifold filter between the pump outlet and the hose catches what the inlet strainer misses. On high-volume days with abrasive primers or pigment-heavy coatings, this filter loads faster than users expect.
Fix: Remove the manifold filter cap, extract the filter element, inspect and clean. On contractor machines, the manifold filter is accessed at the outlet fitting on the pump body. Keep spare filters available — they're a $10–$25 part and should be in your truck at all times.
3c: Tip in unclog position
The RAC X tip has two positions: SPRAY (tip point forward) and UNCLOG (tip point backward). In the unclog position, the machine will run but material exits backward at very low pressure through the open orifice. Many users forget to rotate the tip back after clearing a clog.
Diagnosis: Obvious spray pattern anomaly with fluid coming out in the wrong direction or at very low pressure with no fan pattern.
Fix: Rotate the tip back to SPRAY position — the text or arrow markings on the guard indicate the correct orientation.
3d: Prime valve leaking in SPRAY position
If material is bleeding back to the bucket while in SPRAY mode, the prime valve seat has wear or debris preventing it from fully closing. This is covered in Section 2e above.
3e: Outlet check valve not seating
The outlet check ball (in the upper portion of the pump fluid section) is responsible for holding back fluid on the intake stroke while allowing it up the hose on the discharge stroke. If this ball has debris preventing it from seating, or if the seat itself is worn, fluid bleeds back down through the pump rather than going up the hose.
Diagnosis: Machine primes, switches to SPRAY, but pressure builds only partially or drops away immediately when trigger is held. Compare this to the prime valve diagnosis: the prime valve leak produces rapid cycling even before you pull the trigger; the outlet valve issue typically manifests when you actually trigger the gun and try to spray.
Fix: Remove the outlet valve assembly and inspect the ball and seat. Clean debris from the seat surface. If the seat shows pitting or wear marks that create an uneven contact circle, replace with the 17J880 outlet valve repair kit for Magnum series or the appropriate outlet valve kit for your contractor model.
3f: Worn packings (pressure bypass)
Worn packings allow fluid to bypass internally — the pressure built on the discharge stroke bleeds through the worn packing area rather than going up the hose. The machine cycles rapidly because it's constantly rebuilding pressure that immediately bleeds away.
Diagnosis: Machine that previously held pressure (motor cycling off every 15–20 seconds in SPRAY with trigger released) now cycles every 5 seconds or faster. This is the clearest indicator of packing wear.
Fix: 18B260 packing kit. After replacement, confirm proper packing orientation — leather faces toward the pressure direction. Incorrectly oriented packings produce the same "cycles too fast" symptom as worn packings.
Section 4: Spray Pattern Problems
The machine primes and builds pressure, but the spray pattern is wrong. These are the most nuanced problems because they have multiple potential causes that can produce similar symptoms.
4a: Tailing / Fingering (heavy edges, light centre)
The fan pattern has pronounced heavy lines or "tails" at the top and bottom edges, with a lighter centre. The pattern resembles cat ears or whiskers at the extremities.
Most common cause: Pressure too low for the material viscosity. The tip isn't receiving enough pressure to fully atomise the paint at the edges of the fan.
Fix: Increase pressure incrementally — small adjustments, testing after each one on a cardboard scrap — until the tails disappear and the pattern becomes uniform across the full fan width.
If tails persist at maximum pressure: The tip is worn. An oval-worn orifice produces the same tailing symptom because the edges of the fan don't atomise cleanly through an out-of-round orifice. Replace the tip.
If tails appear only on one side of the fan: The tip orifice is partially blocked on that side, or the tip is installed at a slight angle in the guard. Remove, clean, and re-seat the tip ensuring it's fully and evenly seated in the guard.
4b: Striping (alternating heavy and light bands in the fan)
Parallel vertical or horizontal stripes of heavier and lighter coverage appear on the wall. This produces a striped or banded finish that's visible after the paint dries.
Cause 1 — Pulsing from the pump. If the pump is producing slightly inconsistent output (early packing wear, one check valve seating better than the other), the variations in flow rate produce visible striping on vertical passes. Confirm by checking motor cycling rate and doing a test spray on cardboard.
Cause 2 — Inconsistent gun movement speed. The painter slowing down at the ends of each pass deposits more paint and speeds up in the middle. This is technique, not equipment. Practice maintaining consistent arm speed throughout the full length of each pass.
Cause 3 — Incorrect tip for the material. Material that's too thick for the tip orifice size produces inconsistent atomisation, resulting in banding. Try thinning the material slightly or switching to a larger orifice tip.
4c: Orange Peel / Rough Texture
Paint lands as distinct droplets rather than atomising into a fine mist, producing a texture that looks like orange peel skin.
Cause 1 — Pressure too high. Counterintuitively, excessive pressure for a given material can produce a rough finish because paint is being shattered into droplets that partially dry before reaching the surface. Reduce pressure until the texture smooths.
Cause 2 — Spraying distance too great. Holding the gun more than 14–16 inches from the surface allows paint to partially flash before it lands. Maintain 10–12 inches for standard latex applications.
Cause 3 — Tip too large for the material. A .021 or larger tip on a thin material delivers excessive volume per pass that can't level before it dries. Use a smaller orifice tip for thin materials.
4d: Sputtering and Spitting
The gun alternates between spraying normally and producing bursts or drops of unatomised paint.
Cause 1 — Gun filter partially clogged. The most common cause of sputtering. Even a partially blocked gun filter produces intermittent flow restriction that appears as spitting. Remove and replace the gun filter.
Cause 2 — Air in the suction line. If the suction tube is drawing a mix of paint and air (low paint level, small crack in the suction tube), the intermittent air pocket reaches the gun as a spit. Check suction tube submersion and inspect for cracks.
Cause 3 — Gun needle not seating cleanly. When the trigger is released, the gun needle should close cleanly against its seat, stopping flow completely. A needle that doesn't seat properly allows pressure to build up between the needle and tip, releasing as a spit when the needle momentarily lifts. Clean the needle and seat assembly — debris is the most common cause. If cleaning doesn't resolve it, the gun rebuild kit replaces needle and seat.
Cause 4 — Extension pole decompression. When using a pole gun or tip extension, the column of pressurised material between the gun needle and the tip orifice decompresses through the tip when the needle closes. This produces a characteristic brief spit right at trigger release. This is not a defect — it's a physical property of long extension paths. Graco's Clean Shot Valve (part 287030) threads onto tip extensions to eliminate this by closing the extension outlet at trigger release.
4e: Runs and Sags
Paint is sagging or running down vertical surfaces before it dries.
Cause 1 — Too much material applied per pass. Moving the gun too slowly, or making multiple overlapping passes on the same area without allowing any flash time. Speed up movement and overlap by 30–40%, not 80%.
Cause 2 — Pressure too high. Very high pressure on a thin material can deposit an excessive wet film that sags. Reduce pressure.
Cause 3 — Too close to the surface. Less than 8 inches from the surface concentrates excessive material. Maintain 10–12 inches.
Cause 4 — Material too thin. Over-thinned paint or a very low-viscosity product runs before it can flash. Check that thinning hasn't exceeded manufacturer recommendations.
4f: Fan Pattern Narrower Than Expected / Short Fan
The fan is noticeably shorter and fatter than the tip code indicates — a 517 that should produce a 10-inch fan is producing a 6 or 7-inch fan.
Cause 1 — Tip wear. This is the textbook symptom of a worn tip. The orifice wears oval, and as it does, the fan length collapses while the orifice size increases. When the fan collapses 25% from its original length, replace the tip. Graco specifically documents this — the tip that came with a 515 should produce a 10-inch fan; when it's producing 7 inches, it needs to go.
Cause 2 — Pressure too low. Very low pressure produces a short fan even with a good tip. Test by increasing pressure and observing whether the fan extends.
Cause 3 — Tip partially blocked. A particle lodged in the orifice constricts the fan on one or both sides. Reverse the tip and clear. If the block doesn't clear, soak the tip in water or appropriate solvent for ten minutes before retrying.
Section 5: Pulsing — The Squirt-and-Pause Problem
Pulsing is distinct from sputtering. Where sputtering is irregular and intermittent, pulsing is rhythmic — spray, brief pressure drop, spray, brief pressure drop — producing a pattern that looks like horizontal stripes on vertical passes.
5a: Pump struggling to keep up with tip size
Every airless sprayer has a maximum flow rate, and every tip size demands a specific flow rate from the pump. If the tip orifice is too large for the pump's output, the pump can't fill the hose fast enough between strokes, producing a rhythmic pressure variation that pulses through the tip.
Diagnosis: Does the pulsing happen with all tip sizes or only with a specific large tip? If only with a large tip, the pump is out of capacity for that configuration.
Fix: Reduce tip size to within the machine's rated maximum. The Graco 395 PC is rated for a maximum .023-inch tip; running a .027 will cause pulsing because the machine can't sustain that flow rate.
5b: Early packing wear
Worn packings cause inconsistent pressure output per stroke — the discharge stroke builds slightly different pressure each time, producing a rhythmic pulse that follows the stroke frequency. This produces pulsing even at tip sizes that worked fine when the packings were new.
Diagnosis: Pulsing that develops gradually over weeks of use, or pulsing on machines that have put many hours on the current packing set.
Fix: 18B260 packing kit.
5c: One check valve seating better than the other
The pump has two check valve assemblies — inlet and outlet. If one is seating cleanly and the other has partial debris preventing full closure, the inconsistency in valve timing produces a rhythmic pulse.
Diagnosis: Pulsing that's regular and consistent, at the pump stroke frequency.
Fix: Clean both check valve balls and seats. If either seat shows wear or the ball doesn't fully seat cleanly after cleaning, replace that valve assembly.
5d: Low material level in bucket
As the paint level drops, the suction tube draws increasingly close to the bucket bottom, and small turbulence effects from the suction pull can introduce brief air pockets, producing irregular pulsing rather than the rhythmic mechanical pulsing described above.
Fix: Refill the bucket or tilt it to concentrate remaining material at the suction tube.
5e: Manifold filter partially clogged
A partially loaded manifold filter restricts flow inconsistently, producing pressure variations that appear as pulsing at the tip. This is particularly common with primers and materials that load the filter quickly.
Fix: Replace the manifold filter.
Section 6: Motor Problems
6a: Motor runs constantly without cycling off in SPRAY mode
Normal operation (important to understand first): In SPRAY mode with the trigger released, Graco SmartControl machines maintain pressure until it bleeds below the set threshold, then restart the motor. On a healthy machine with fresh packings, this produces a cycle time of 15–25 seconds at normal pressure settings. If the motor runs continuously without ever stopping, either:
The pressure is bleeding down so quickly that the motor can't catch up (worn packings — same as Section 3f)
The pressure transducer isn't reading system pressure correctly
The machine is in PRIME mode rather than SPRAY mode (check the prime/spray valve position)
6b: Motor shuts down during spraying / thermal shutdown
Cause 1 — Tip too large. The motor is working against excessive load trying to maintain pressure through an oversized orifice. Use a tip within the machine's rated maximum.
Cause 2 — Pressure too high. Running at maximum pressure for extended periods in high ambient temperatures causes motor heat buildup. Lower the pressure to the minimum that produces an acceptable spray pattern.
Cause 3 — Hose too long. Running 150+ feet of hose on a machine rated for 100 feet maximum causes the motor to work much harder to maintain tip pressure. Use appropriate hose lengths.
Cause 4 — Motor vent blocked. On TEFC machines, the external fan cooling system requires airflow around the motor housing. Paint overspray accumulating on the motor housing, or the machine being covered or placed against a wall during operation, reduces cooling and causes thermal shutdown.
Cause 5 — Extension cord too long or inadequate gauge. Voltage drop through an inadequate extension cord causes the motor to draw more current to maintain torque, producing heat. Use a 12-gauge cord no longer than 100 feet.
Allow the motor to cool completely (15–30 minutes) before restarting after a thermal shutdown. If the problem recurs consistently at normal operating conditions, the motor's thermal protection is responding to genuine overloading — identify and resolve the root cause rather than resetting it repeatedly.
6c: Motor runs but pump doesn't move
The motor is audible but the piston rod isn't moving, or is barely moving.
Cause: The drive train between the motor and pump has a mechanical failure — typically a broken or slipped drive component, or a frozen pump (from dried paint or freeze damage) that the motor can't turn against.
Fix: This almost always requires a service centre visit unless you have experience disassembling the drive housing. Before sending it to service, try placing the machine in a warm environment (garage heated to 70°F+) overnight if you suspect freeze damage, then attempt startup again. A frozen pump that thaws sometimes frees itself.
Section 7: Leaks
7a: Paint leaking at the packing nut
Paint weeping around the packing nut area means the packings have worn enough that paint is bypassing the seal stack and reaching the rod area above the fluid section. Do not continue running the machine after this symptom appears — dried paint on the rod acts as an abrasive that can score the cylinder bore.
Fix: 18B260 packing kit. Clean the piston rod thoroughly before installing new packings — dried paint residue on the rod will immediately damage new packings from the first stroke.
7b: Paint dripping from the gun body
Paint leaking around the gun body (not from the tip) indicates the gun needle/seat assembly has worn or a connection O-ring is failing.
Fix: Remove and clean the needle assembly completely — debris is the most common cause and the easiest fix. If cleaning doesn't stop the leak, replace the gun with a rebuild kit or a new gun body.
7c: Paint leaking at hose connections
Leaks at the hose-to-machine or hose-to-gun fittings are almost always O-ring failures or inadequate thread engagement.
Fix: Tighten the fitting (firm, not over-torqued — over-torquing crushes the O-ring unevenly). If tightening doesn't stop the leak, replace the O-ring. Keep the 117828 O-ring packing kit in your parts bag — these are the O-rings for connection points throughout the fluid path.
Never attempt to repair a leaking high-pressure hose with tape or wrapping. A hose that leaks at the inner liner must be replaced. A hose that bulges at any point must be replaced immediately — that's a failure about to happen at 3,000+ PSI.
7d: Fluid leaking from the TSL/wet cup area (contractor models)
A small amount of material migrating into the TSL cup is normal — it's part of how the system works. Paint puddling below the packing nut, or the TSL area consistently showing significant paint rather than just mild tinting, indicates the lower packing stack has enough wear that material is pushing up past the seal.
Fix: Packing replacement. This is the same as 7a, just caught earlier.
Section 8: The Quick Reference Diagnostic Chart
For fast reference, here is the symptom-to-cause matrix:
Won't start → Check power, extension cord, circuit breaker button, pressure setting
Runs but won't prime → Suction tube depth, inlet strainer, stuck inlet ball, air leak, prime valve, packings
Primes but no pressure → Gun filter (first), manifold filter, tip position, prime valve, outlet valve, packings
Tailing / fingering → Increase pressure; if persists at max, replace tip
Orange peel → Pressure too high; too far from surface; tip too large
Sputtering / spitting → Gun filter, air in suction line, gun needle seat, extension decompression
Runs and sags → Slow gun movement, pressure too high, too close, material too thin
Fan too short / collapsed → Worn tip (primary cause); pressure too low
Pulsing → Tip too large for pump, worn packings, check valve seating, low material, manifold filter
Motor won't stop cycling → Worn packings (fast bleed-down), transducer, wrong valve position
Motor shuts down → Tip too large, hose too long, pressure too high, vent blocked, extension cord inadequate
Paint at packing nut → Worn packings — service immediately
Hose leak → O-ring at fitting, or replace hose (never tape a hose leak)
Section 9: The Diagnostic Decision Tree
When a problem is ambiguous — when a single symptom could have several causes — use this decision sequence:
Step 1: Check all filters first. Gun filter, manifold filter, inlet strainer. In this order. Most pressure and spray pattern problems are filter problems, and filters take three minutes to check and clean. If filters are clean and the problem persists, proceed.
Step 2: Test with clean water. Flush the machine and prime with clean water. If the problem disappears, the issue is material-related (too thick, needs straining, debris in material). If the problem persists with clean water, it's mechanical.
Step 3: Swap the tip. If you have a spare tip of the same size, swap it. If the problem changes or resolves, the tip was the issue — worn, damaged, or clogged in a way that reversing and clearing didn't fix.
Step 4: Check the prime valve position under load. In SPRAY mode, with the machine running and the trigger released, observe whether the machine holds pressure or immediately bleeds down. Fast bleed-down (motor restarting within 5 seconds) indicates prime valve leak or packing wear. Moderate bleed-down (10–12 seconds) indicates packings approaching end of service life.
Step 5: If the above don't resolve it, the problem is a check valve (inlet or outlet), a damaged piston rod, or a component requiring disassembly. At this point, identify which specific valve by the diagnostic pattern described in Sections 2 and 3, order the correct kit, and proceed with the rebuild.
The Parts That Fix 90% of Field Problems
Every problem described in this guide that isn't electrical or structural traces to one of these components. Keep them on your truck:
18B260 Pump Packing Kit — resolves worn packings (Sections 2f, 3f, 5b, 6a, 7a, 7d)
239922 Inlet Valve Seat — resolves stuck or worn inlet ball (Section 2c)
235014 Prime Drain Valve Kit — resolves prime valve leaking in SPRAY mode (Sections 2e, 3d)
17J880 Outlet Valve Repair Kit — resolves outlet check valve not seating (Section 3e)
117828 O-Ring Packing Kit — resolves connection leaks and O-ring failures (Section 7c)
Gun filters × 10+ — resolves the most commonly missed pressure and spray pattern problem (Sections 3a, 4d, 5e)
RAC X spray tips in working sizes × 2 spares each — resolves worn tip symptoms (Sections 4a, 4f, 5a)
All of these are genuine OEM Graco parts, stocked and available with same-day shipping on qualifying orders placed before 1pm CST at SprayersAndParts.com. If you need to confirm correct part numbers for your specific machine model and series letter before ordering, the interactive Graco parts diagram provides the exploded view for your exact machine. Technical support at 713-931-4102, Monday–Friday 8am–4pm CST.

