Recycle Bin Recovery After Shift+Delete: How to Recover Permanently Deleted Files
Accidentally Used Shift+Delete? Here’s How to Recover Permanently Deleted Files
You were clearing out a folder, hit Shift+Delete out of habit, and now the file is nowhere to be found, not even in the Recycle Bin. But Shift+Delete doesn’t instantly shred your file. It removes the file’s reference and frees up space for reuse, while the actual data usually remains until it is overwritten.
That’s the window you must look for, and that’s why Recycle Bin Recovery is possible even when the Recycle Bin is empty. This guide explains what happens when you Shift+Delete a file, and why files skip the Recycle Bin. You’ll also learn three practical ways to recover permanently deleted files before that window closes.
Key Takeaways
Shift+Delete bypasses the Recycle Bin, but deleted data may remain recoverable until overwritten.
Stop using the affected drive immediately to reduce the risk of overwriting the deleted file.
Try Windows Backup or File History first, then Windows File Recovery if you’re comfortable with command-line tools.
For an easier option, 4DDiG Data Recovery offers guided scanning, file previews, and support for 2,000+ file types, including external drives.
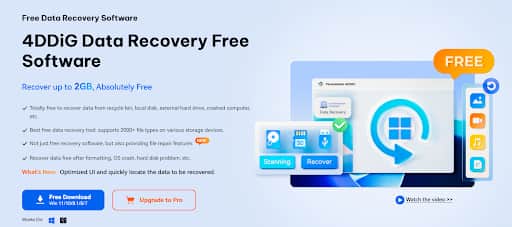
4DDiG Free Data Recovery Software allows up to 2GB of recovery, so you can preview and confirm files before upgrading if needed.
What Happens When You Press Shift+Delete?
On Windows, normal Delete moves a file to the Recycle Bin, while Shift+Delete skips it entirely. Instead, Windows removes the file’s entry from the file system index and marks its space as available. The file’s actual data usually remains until new data overwrites it.
Think of it like tearing a page from a book's table of contents. The chapter is still there, but you no longer have a way to find it. That’s why time matters. Every new file, cache update, or Windows update increases the risk of overwriting the deleted data, making recovery impossible.
Common Reasons Files Are Permanently Deleted
Shift+Delete isn’t the only way files bypass the Recycle Bin safety net. Here are the most common scenarios that lead people to search for permanently deleted file recovery:
Shift+Delete: Bypasses the Recycle Bin and deletes the file directly.
File Too Large: Files larger than the Recycle Bin’s capacity are deleted immediately.
External Drives: Files deleted from USB drives, SD cards, and similar devices generally skip the Recycle Bin.
Recycle Bin Emptied: This removes the last easy recovery option.
Immediate Steps After Shift+Deleting a File
What you do in the first few minutes after a Shift+Delete has a real impact on whether Recycle Bin recovery succeeds. Before trying any recovery method, here’s what you must do:
Stop Using the Drive: Don’t save files, install programs, or run updates on the affected drive.
Avoid Cleanup Tools: Don’t empty other Recycle Bins or use disk cleanup utilities, as they may remove useful caches.
Don’t Format or Reinstall: Avoid formatting or reinstalling Windows, even if the drive becomes inaccessible.
Note the File Location: Record the drive letter and folder to help recovery tools scan more precisely.
Act Quickly: Choose a recovery method as soon as possible to reduce the risk of overwriting the file.
Method 1: Check Windows Backup or File History
If you have a Windows Backup or File History containing the files that were permanently deleted, this is the fastest and safest recovery method. But the backup must be enabled before deletion. Also, this method won’t recover files that were never backed up, and it can’t restore something created and deleted between backup cycles. Here’s how to check for Windows Backup or File History:
Step 1: Type “Restore files with File History” into the Windows search bar and open it.
Step 2: Move to the folder where the deleted file existed before it was deleted.
Step 3: Use the left and right arrows to browse through backup snapshots until you find the version that contains your file.
Step 4: Select the file. Click the green “Restore” button to retrieve it to its original location, or right-click to restore it to a different folder.
Step 5: If File History wasn’t set up, head to “Settings.” Choose “System.”
Step 6: Next, tap “Backup” to check for a Windows Backup or OneDrive folder backup that might contain a copy of your deleted file instead.
Method 2: Use Windows File Recovery
Microsoft’s Windows File Recovery is a free, Microsoft-supported command-line tool designed for cases like Shift+Delete and emptied Recycle Bins. This is ideal only if you’re comfortable with basic command-line syntax and want to try it before installing third-party software.
Besides, it recovers files rather than folder structures, may not find all file types, and may produce inconsistent results. If it’s too technical or doesn’t work for you, skip to Method 3. Follow the steps beneath to recover permanently deleted files with the Windows File Recovery tool:
Step 1: Install Windows File Recovery from the Microsoft Store. Then, open it as administrator (it will prompt for permission).
Step 2: Use the basic syntax:
winfr source-drive: destination-drive: /switches
Step 3: For a recently deleted file on an NTFS drive, try the default mode first:
\Users\YourName\Documents\filename.docx winfr C: D: /n
Step 4: If the default mode doesn’t find it, try Signature mode, which scans for specific file types by their data structure:
winfr C: D: /r /n *.docx
Step 5: Always recover to a different drive letter than the one you’re scanning to avoid overwriting.
Step 6: Check the recovered files in the destination folder Windows File Recovery creates.
Method 3: Recover Permanently Deleted Files with 4DDiG Free Data Recovery Software
When File History isn’t set up, and the command line feels like more trouble than it’s worth, a dedicated recovery tool with a visual interface is usually the fastest option. Choose one that lets you preview exactly what’s recoverable before committing and offers a guided scan instead of requiring recovery commands. 4DDiG Free Data Recovery Software offers exactly that with a beginner-friendly graphic interface, selective recovery, and preview.
Why 4DDiG Data Recovery Works for Shift+Delete Recovery
4DDiG Data Recovery can scan files removed with Shift+Delete, emptied Recycle Bins, and deletions from drives that don’t use a Recycle Bin at all, like USB drives and SD cards. As it performs read-only scanning, it doesn’t write anything to the source drive during the scan. This matters when every additional write increases the risk of overwriting the file you’re trying to save.
Key Features:
Free Tier: Recovers up to 2GB of files at no cost for Windows users.
Recovery Scenarios: Recovers files deleted via Shift+Delete, emptied Recycle Bins, formatting, or partition loss.
Supported Devices: Supports internal drives, external HDDs/SSDs, USB flash drives, and SD/memory cards.
Preview Before Recovery: Scans and previews files so you can confirm they’re intact before restoring them.
2,000+ File Types: Supports documents, photos, videos, audio, compressed archives, and more.
Read-Only Scanning: Doesn’t modify or overwrite the original drive during scanning.
Step-by-Step Recovery Process
Here’s how to recover permanently deleted files with 4DDiG Data Recovery:
Step 1: Download & Install:
Install 4DDiG Data Recovery on a drive other than the one where the file was deleted.
Step 2: Select Location:
Launch the software and select the specific drive or folder where the file was located before you Shift+Deleted it. Pick the file types to scan.
Step 3: Run a Full Scan:
Start the scan to check deleted entries and deeper, overwritten-but-not-fully-erased data. Use file-type filters and the search bar to find exact file matches while the scan is still running, rather than waiting for it to finish.
Step 4: Preview and Recover Files:
Double-click a file to confirm it’s the correct, undamaged version before recovery. Select the files, click “Recover,” and save them to a different drive than the one scanned.
Note: 4DDiG Free Data Recovery Software supports recovering up to 2GB of data. If you need to recover more, you can purchase the professional version of 4DDiG Windows Data Recovery Software after confirming that the files are recoverable.
Frequently Asked Questions
Q1: Can I recover files deleted with Shift+Delete?
Yes. The files aren’t physically erased. Only the reference to them is removed. As long as the data hasn’t been overwritten, recovery is possible using tools like 4DDiG Free Data Recovery Software.
Q2: Why aren’t Shift+Delete files in the Recycle Bin?
Shift+Delete bypasses the Recycle Bin entirely. Windows treats this as a permanent deletion command and doesn’t move the file to the Recycle Bin folder.
Q3: How long do I have to recover a Shift+Deleted file?
There’s no set time limit. It depends on when the disk space gets overwritten. The sooner you attempt recovery, the better your chances. Stop using the drive immediately after deletion.
Q4: Can I recover Shift+Deleted files from an external drive?
Yes. 4DDiG Data Recovery Software supports recovery from external HDDs, USB drives, and SD cards. Connect the drive to your computer and select it in the software.
Q5: Is it safe to use 4DDiG Data Recovery on my computer?
Yes. 4DDiG Data Recovery is from Tenorshare, a reputable company with 40+ Million of downloads. It performs read-only scanning and never modifies your original data.
Final Thoughts
Shift+Delete feels final, but it isn’t, not immediately. As soon as you notice a file is missing, stop using the drive and go straight to Recycle Bin recovery. For most people, that means skipping the command-line learning curve of Windows File Recovery and using a visual tool that previews files before recovery.
4DDiG Data Recovery scans Shift-deleted files, emptied Recycle Bins, and external drives without writing to the source drive during scanning. Start with the free 2GB recovery, confirm your files through the preview, and upgrade only if needed.
